
My new school got new furniture this year! Usually the district collects and stores all the old furniture, but with several schools upgrading, the furniture depository was full. That meant it was all up for grabs, and this old reading table came home with me!

Some foam, fabric, and a lot of staples later and that old reading table looks like this:

There are a lot of posts and tutorials out there about how to turn a table into a tufted ottoman, and I found Little Green Notebook and M is for Mama be the most helpful.
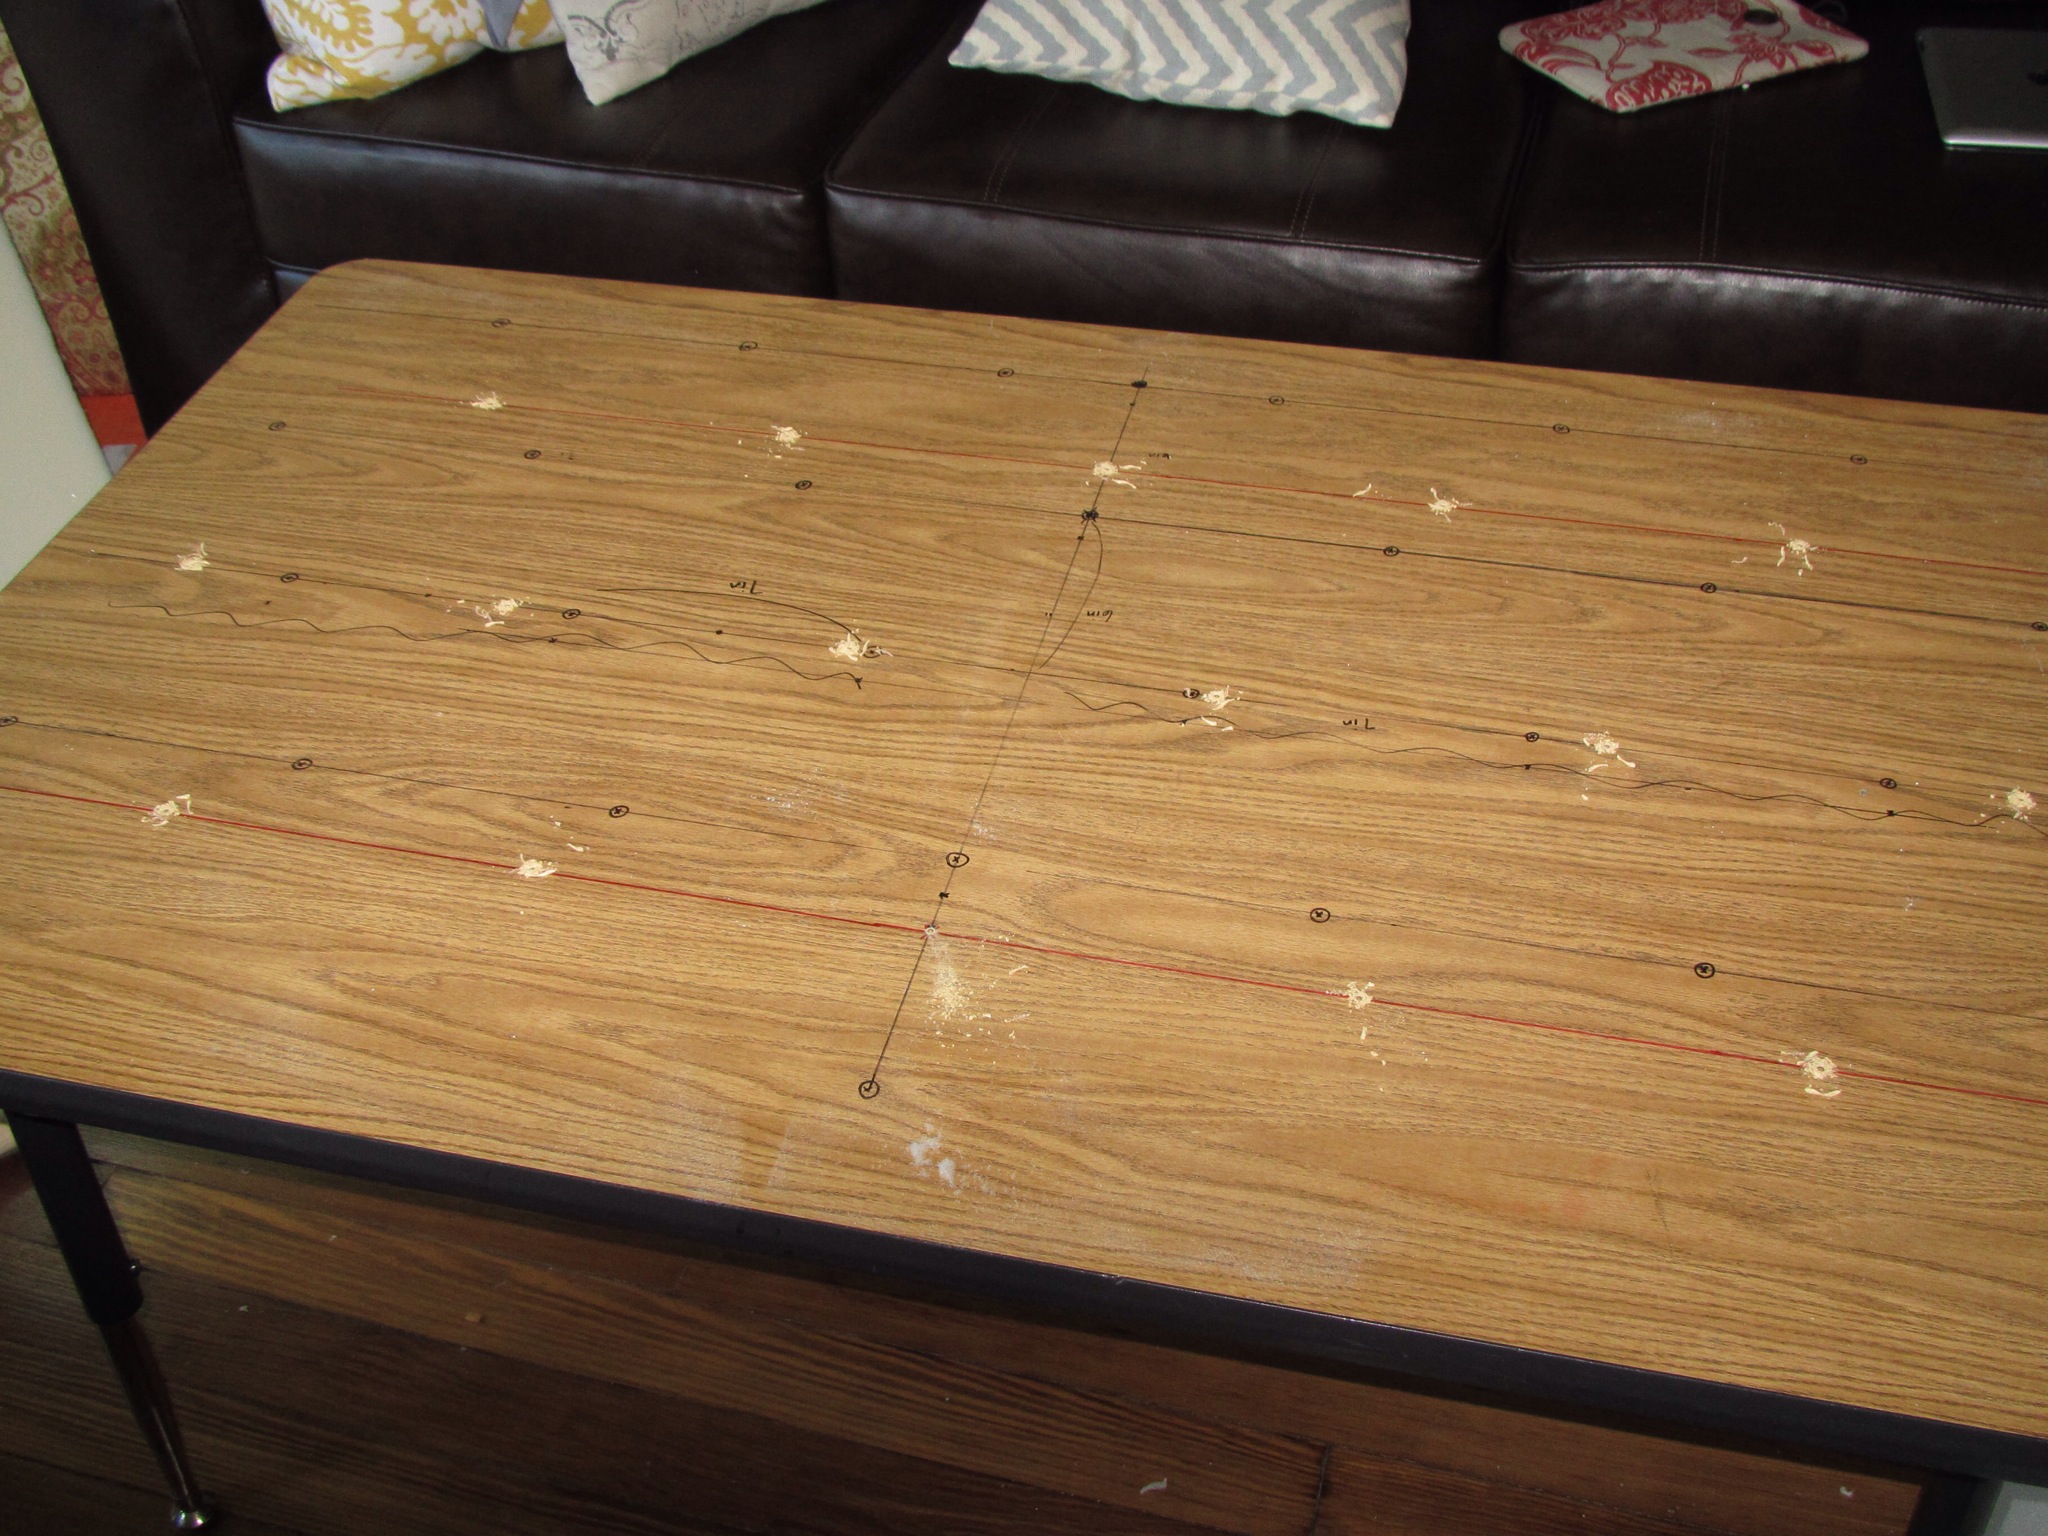
For me, the first step was to measure out how far apart to space the buttons. This was surprisingly difficult! After the third time measuring or so, I finally got it and could drill the holes. Pre-drilling the holes was suggested by several others, and ended up being a super important step.
I then attached the foam with spray glue and cut holes where the buttons would go using a steak knife.

The foam was covered with a layer of thick batting and the fabric. I chose an indoor/outdoor fabric that was marked way down for the end of the season. I’m hoping it will be less likely to stain!

Since I predrilled all the holes, I was hoping it would be easier to use screws and washers to make the tufts instead of pulling the thread through (which is how a professional would do it). Everything I’d seen on tufting said it was pretty challenging to do on your own, since you had to go back and forth from front to back as you sewed the buttons down, and that it was pretty painful too, pulling each button through with all your might. Since Mr. Electric Screwdriver and I are pretty good buddies these days, I decided to try that route. Easier? Probably. Easy? Not one bit. I finally got into a rhythm though as I realized that lifting the foam up off the table allowed me to see what I was doing as I stuck the screw and washer into the foam, found the predrilled hole, then used the screwdriver to screw it down.
The further along I got, the better each tuft looked. The folds really started to tighten up and form the diamond shape.

Before I finished the tufting, Tony helped me attach the new legs. It would have been more economical to use the metal legs that the table came with, but then I’d have to cover the whole base. New wooden legs were going to be a much better option. I took out the flat screw that they come with and used three long screws in each leg so they’d be nice and sturdy. It was easy to attach the legs from the top, since the foam, batting, and fabric would hide the screws. Then Tony also helped me attach the fabric around the outside. I’ve done a couple upholstery projects before, and my staple gun was actually the first real tool I owned, but this table was so solid that I couldn’t push the staple in by myself! So I held the fabric down and Tony stapled for me. Unfortunatly, there’s no photographic evidence as both hands were required at all time, but he did help! (And he even struggled a bit – that’s how hard the wood that made that table is!) The end result after that first day was this:

A couple days later I went back to trim up the extra fabric. A ribbon and a combination of hot glue and staples now hides the seams away.
 Those white spots are old glue that some sticky fingers left behind. Eww!
On the top, I used hot glue to attach the covered buttons to the screws. I don’t know how well they’ll last, but they seem okay so far. And should they pop off, they’ll be easy to fix.
So here’s another look at the before and after!

I’m very pleased with the project! The ottoman fills the space in front of our massive sectional much better than our little coffee table did, and the height ratio is much better. I love putting my feet up on it when we’re watching a show, or when I’m writing a blog post!

I did learn a lot though, so I feel much more confident about doing another project of this nature. Here are a few things I’d do differently:
*Cut the holes in the foam a little bigger to accommodate the large buttons – there will still be plenty of plushness
* Use gigantic washers. I used the washers that went with the size screws I bought, on recommendation of the guy at Home Depot – bigger washers would pull the foam and fabric away to make more room for the buttons.
* Use straight seamed sides instead of angled – I like the look of the angled, but they’re not real consisten, and I think it’d look more professionally done if the fabric met at a straight line instead of the angle
At the same time, there were a lot of things I think went really well, so I’d do these again:
*Order foam from Home Depot – the foam camping cushion I ordered was 3 inches thick and was probably half the price I would have paid at a fabric store, even with a good coupon
*Use the screw method – this technique wasn’t terribly easy, but it did work very well and it made the project go pretty quickly!


OMG —- no way was this a school reading table!! Absolutely fabulous….I still can’t believe it! =)
As you know – I love the table!! So hard to believe that the table we hauled home from school is now that beautiful piece of furniture!! Your fabric choice is perfect, too!!!
What a fantastic job you did –
Love, Mom
Pingback: Dining Room Chairs | A Guy, A Girl, and a Really Old House!
Pingback: Nursery Project 1: Glider | A Guy, A Girl, and a Really Old House!